English


Christstollen is a traditional German, a dense fruit bread cake-like made with yeast, water and flour, with nut, spices and dried or candied fruit.
Other ingredients: mixed spices( [ginger bread spices]) content: nutmeg, cardamom, cinnamon, fennel, star anise.... milk, sugar, butter, almond.
Some recipe is with a rolled marzipan/almond paste into the stollen, you can add into the stollen if you like. This is a bakery recipe where i worked in Switzerland, normally every years we start baking Christstollen around end of November - 2nd week of December. Stollen is salthered with melted unsalted butter and rolled in caster sugar [instead icing sugar] resulting in a moister product and keep longer and better, The dried fruits macerated in rum or brandy for a superior tasting bread.
The texture dense with full with rum fruit bread, i like the taste with spices.

Prepare time: 200 mins
make 2 pieces @ approx. 680gr.
Soak all Dried Fruit one day before:
| 200gr | Black raisin |
| 62gr | Orange peel |
| 62gr | Lemon peel |
| 25ml | Rum |
| 50ml | Water |
| (cover and in refrigerate for one night) | |
| 62gr. | sliced almond or whole chopped almond |
| 1 | fresh lemon zest |

Predough
| 165ml | Fresh Milk |
| 31gr. | Fresh Yeast(15gr. Instant yeast) |
| 250gr. | T55 Flour or 550 Flour |
Mixing in a dough and let it cover and rest for 60mins.

Main dough
| 55ml | Fresh Milk |
| 30gr | Salt |
| 62gr. | Caster sugar |
| 5gr. | mix spices |
| 22gr. | Unsalted butter |
| 312gr | T55 Flour or 550 Flour |
weight above ingredients and mix with the rum dried fruit and pre-dough.

1. Let it bulk ferment for 45mins.
2. Cut it half each piece approx. 680gr.
3. sharp the dough round and roll out with rolling pin

4. Fold in half of dough in the middle.↑↑↑
5. Preheat oven @190C
6. Let it set on the baking tray for 20mins, that in preheat oven for 40mins.

7. Brush the melted butter on the surface and cover with sugar.


Discover the robust flavor and perfect crumb of our Sourdough Wholewheat Bread with Sunflower Seed. Based on a formula from the Baking Warehouse library, this step-by-step guide walks you through the entire process—from toasting the nutty seeds to achieving a beautiful, scored boule in your Dutch oven. This is the ultimate recipe for hearty, homemade artisan bread.

Quick and easy to make cashew cheese, takes less than 10 mins
Prepare time 1 h
Ingredients:
| 150g | Cashews Nut | |
| 40g | Nutritional yeast | |
| 1Tbsp |
Paprika ground |
|
| 1 Tbsp |
Marble syrup or 1 tsp brown sugar |
|
| 1 clove | Garlic | |
| 1 | Fresh Lemon Juice | |
| 1/4 Tsp | (5g) | Turmeric |
| 1/4 Tsp | (5g) | Cayenne pepper |
| a pinch | Salt | |
| 350ml | Water | |
| 1 Tbsp | (6gr.) |
1. Soak the Cashew for a hour
2. Blend the Cashew smooth with Garlic, Lemon Juice, ,paparika, Tumeric powder, Cayenne, Salt, Maple syrup (or sugar), Nutritional Yeast and 200ml of water.
3. Rest (150ml) water cook with the Agar Agar in a bowl, pour the above mixture to this Agar Agar water and cook and stir for around 3-4 mins.
4. Pour in to a mould (souffle cup) which coated with coconut oil. And set in fridge for 2 hours cover with a plastic flim.
5. This cheese can keep in fridge for 2 months.
*You can taste it and add more acid or salt to seasoning the mixture.


Nutritional yeast it's rich in B vitamins and B12. It's an inactive yeast that is made from sugar cane or beet molasses that have been grown for their nutritional properties.

Here is the recipe for Swiss königs kuchen (kings cake(bread))
Middle part 160g 8 pieces@40g

| For 2 Pieces | |
| 250g | Milk |
| 37.5g | Fresh Yeast / (dry yeast 10g) |
| 5g | Malt Powder |
| 37.5 | Sugar |
| 25g | Egg (another 25g for egg wash) |
| 10g | Salt |
| 1/2 | Lemon zest |
| 87.5g | Butter |
| 37.5g | Almond Paste |
| 500g | White Flour 550 |
| 75g | Dried Raisin |
| 1062g | Total |



Cake shouldn't be off the menu just because you have a gluten-free diet so why not enjoy these moist and absolutely delicious chocolate cake.
Many people think the gluten free /egg free cake are not delicious, as a baker my aim is how to make it delicious like a regular cake. This is the time i bake this chocolate cake in 3 versions, one at a time, only few ingredients has change to GF ingredients. Let's see the cake you never know it is made with Gluten free and Gluten and Egg free cake when you taste it.
Prepare time : 1hours
Baking time: 45-50mins
Quantity: 1 piece (bakeform for 600g-650g)

CUP4CUP Multipurpose flour 1 :1 (rice flour base GF flour)
Neat egg - a egg replacer (chia seed and bean)
Trimoline - invert sugar (creating a smoother mouth feel and control the moisture)
How easy to make any recipe to be a Gluten free recipe with the 1 : 1 gluten free multipurpose flour. Just few ingredients replace and easy make a gluten free cake and the taste is so good until i don't telling you it is Gluten free

All come out nicely, moist in texture, rich of chocolate, You'd never guess that it's free from eggs, wheat. Yummy.
non-gluten free cake isn't big difference compare the gluten free in taste texture. Due this gluten free flour are based from rice flour and starch.
The last one is Egg free and Gluten free, stretchy texture and dense as the neat egg ingredients are chia seed and garbanzo beans, sticky egg-like substitute. And you can see in the recipe is half weight from regular recipe on fresh egg. The garbanzo bean enhance a extra special flavor in this cake. worth to try!
Chocolate cake recipe:

 |
 |
 |
||
| 150g (3) | Eggs | Eggs |
21g Neat Egg +42ml water |
|
| 45g | Trimoline | Trimoline | Trimoline | |
| 75g | Caster Sugar | beat together with eggs
|
||
until light yellow
|
||||
| 45g | Hazelnut Meal GF | Hazelnut Meal GF | Hazelnut Meal GF | |
| 73g | Pastry cake Flour | Gluten free flour by CUP4cup | Gluten free flour by CUP4cup | |
| 15g | Cacao powder | Cacao Powder GF | Cacao Powder GF | |
| 4.5g | Baking powder GF | Sifted all dry ingredients(2) | Baking powder GF | Baking powder GF |
finish the mix
|
||||
| 72g | Cream 35% | Cream 35% | Cream 35% | |
| 45g | Butter | melt @45°C
|
Butter | Butter |
| 1 pinch | salt | salt | salt | |
| 88g | 70% Dark Chocolate GF |
 melt @37°C add to melt @37°C add to
|
70% Dark Chocolate GF | 70% Dark Chocolate GF |
| Total | 620g | 620g | 520g | |
| weight after baking | 587g | 570g | 499g | |
| Baking Time & Temp. | 45mins@165°C | 50mins@165°C | 50mins@165°C |
well beat the egg until fluffy and light yellow


Photos; Author by May Leung



Product find in section here
Taste of Italy - Panettone
Prepare Time: 48 hours
Quantity: 2 pieces 17 cm
Ambient Temperature: 29°C
Difficulty : ***** (experience making sourdough bread)
[Day 1: #1Levain(3hours)>#2Levain(3hours)>#3Levain(3hours)>predough(12hours)]
Day 1 at 6am
#1 Levain
| 20g | strong white flour (artisan bread flour) / 0 flour (Italian flour) |
| 20g | natural yeast sourdough* |
| 12g | water |
Why bob's red mill artisan bread flour?
Artisan bread flour is good to make a long fermentation bread dough, as it is high gluten protein to 13.5%, you may use T80, as i use both before in bakery (see flour protein comparison>>)
*if you have a stronger starter(age starter) you can start from #2 : )
Day 1 at 10 am
#2 Levain
| 40g | strong white flour (artisan bread flour \ 0 flour (Italian flour) |
| 40g | #1 |
| 25g | water |
Day 1 at 2 pm
#3 Levain
| 80g | strong white flour (artisan bread flour \0 flour (Italian flour) |
| 80g | #2 |
| 45g | water @28°C |
Point:
1.Each part refresh levain allow to rise for approx. 3 hours and tripled in volume (the method is similar same as the "Build a Leavain")
2. check the temperature to adjust the time or volume.
3. Stir the dough for around 5 mins and cover in a container and the refresh levain need to be waited until tripled in volume.
4. Take out the butter in room temperature, prepare for the predough in next step.
REMARK: If your starter is store in fridge, take out from fridge at night before you start to make the #1 Levain. Otherwise from #1>#2>#3 between refreshing time is longer that 3 hours.
Panettone Predough: (The time is around 6-7pm. check and until the levain is tripled in volume, before to make the dough.)
| 400g | Artisan Bread Flour | or 0 flour (Italian flour) |
| 190g | #3 Levain | |
| 150g | Water | |
| 175g | Caster sugar | low heat melt the sugar in water |
| 200g(10) | Egg yolks | put half in the mixing, until the dough combined that add the remaining egg yolks. |
| 170g | Butter, soft | little by little add into the dough |
| 1285g | TOTAL |

Point:
1. Melt the caster sugar in the water over a low heat(don't boil), then add the flour and half of egg yolk combine in a stand mixer and mix thoroughly to obtain a smooth an elastic dough.
2. Add the #3Levain with remain egg yolks, mixing until combined. Finish by adding the soft butter a little at a time.
3. Let them ferment for 12 hours @ 28°C cover with plastic wrapper.

Day 2: 2nd dough(1 hours)>Cut it half and proofing(6 hours)>Icing topping> Bake(50mins)>Up side down(6-12 hours)
Day 2 at 7:00am
| 100g | Artisan Bread Flour | or 0 flour (Italian flour) |
| 35g | Caster sugar | |
| 60g (3) | Egg yolks | |
| 60g | Butter, soft | |
| 16g | Honey | |
| 12g | Salt | |
| 1/2 | Vanilla pod | cut it in the middle and scrape the seed |
| 1/2 | Fresh Orange zest | |
| 1/2 | Fresh Lemon zest | |
| 200g | Candied orange cube / (Candied mix fruit) | cut the orange peel in cube |
| 200g | Raisins |

1. Knead the dough with day 1 pre-dough for about 10-15 mins
2. Add the sugar and egg yolks x 3 into the dough when kneading
3. Add honey, vanilla pod(seeds), orange and lemon zests.
4. Butter little by little add to the dough and mix until smooth, shiny and elastic. Mix together the candied oranges cube and raisins in finally. Allow to rest for one hour with cover.
5. divide the dough 1.5 hours later, cut in 2 pieces approx. 1000g in the Panettone mold Leave to rise for another 5-6 hours@28°C
6. AT around 3.30pm. Bake in a preheat oven @180°C for 20 Mins 170°C 30Mins

Icing Topping
| 40g | White almond flour |
| 40g | Hazelnut flour |
| 120g | Caster sugar |
| 9g | Cake flour |
| 2g | Cacao powder |
| 3g | Corn starch |
| 50g | Egg white |
| Whole almond | |
| Pearl sugar |



running out vanilla extract in kitchen.... you can make your own vanilla extract! Even as a gift for your friends and families
Easy 3 steps- slice , shake , wait ...
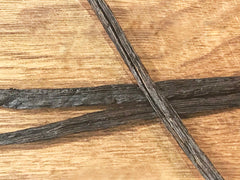

Vanilla bean - slice the vanilla bean each
Alcohol - Vodka, rum, bourbon, brandy
easy to pour an alcohol in ready use Infusion kit with a ready swing top bottle.

 Look! after 8 weeks vanilla extract!

Prepare time: 1 day for sourdough , half day bulk ferment and folding, retard the dough approx. 8-12 hours.
Recipe
| Sourdough (levain) | 60 gr. | starter prepared |
| Artisan bread flour | 300 gr. | |
| Water | 195 ml | |
| Sea Salt | 6 gr. | |
| Turmeric powder | 3 gr. | |
Utensil: Proofing Basket, scraper, Dough whisk
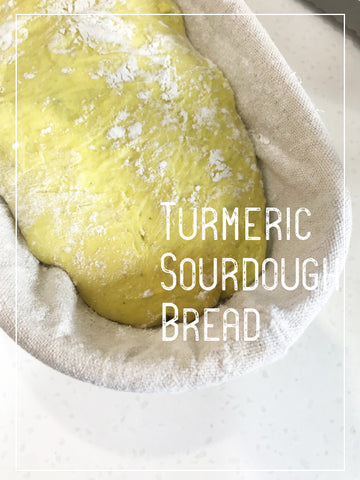
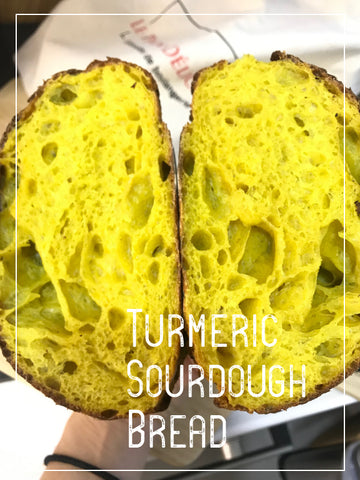
A Golden gorgeous loaf today. Adding turmeric to the dough is not only healthy, it makes the bread look nice too. This was using basic sourdough bread that needs a pinch Turmeric powder you easy found in kitchen.
Bakes into a beautiful color, crunchy crust , moist, spiced loaf. Prepare the sourdough one day before. feeding twice. Hand mix all ingredients in a dough except the salt. Rest around 2-3 hours for autolyse, sprinkle the salt in the first flow.
I mostly doing the way: folding 2 times in bulk > (divide) shape > retard the dough* in the basket 14 hours in fridge, then for next day for baking straight in the preheat oven 250°C for 35 mins with steam.
For this time i make a bit different (bulk) folding 3 times every 1-1.25 hours > shape > form in proofing basket with plastic cover for 2.5 hours at room temperature and bake in a preheat oven with steam.
What does "retarding the dough" mean? D. Monsborough from https://www.goodfood.com.au
Yeast is a single-celled organism that converts sugar into carbon dioxide, water and alcohol. It also produces enzymes that convert the starch in flour (polysaccharides) into simple sugars (monosaccharides) that are in turn converted into CO₂ and alcohol. Modern bread mixes contain bread improvers, such as the enzyme amylase, and malt to give the yeast something to eat while the enzymes work. If bakers don't want to add improvers, they can slow the fermentation to allow the yeast to create enough enzymes to convert the starch to sugar. Bakers do this by allowing the bread dough to ferment, forming it into loaves, then placing the unbaked loaves in a cooler. This is retarding the dough. Yeast is still active at low temperatures, but it works very, very slowly. While it is working, it also produces other organic compounds that give subtle aromas to the bread. You can do this at home. Make bread according to the recipe, form the loaves, place them on the tray, dust them with flour, and wrap them in plastic. Refrigerate overnight. Allow the loaves to rise again in a warm place until they double in size – about two hours – and bake according to the instructions.

German type rye flour vs rye flour from US
Just trying to make both in a simple traditional Roggenbrot mit sauerteig (Ryebread with sourdough)


Sour culture - In a glass jar/ bowl, combine flour and water , cover and ferment at room temperature (25-28°C) 16-24 hours. The sponge will have a strong sour aroma in following day 2
Using the 1:1 rye flour , water as sourdough, feeding 2 times a day continue feeding for 2-3 days
| g/ml | Ingredients | Percentage |
| 10 ml | Warm (35°C) water | 50% |
| 10 g | rye flour | 50% |
| g/ml | Ingredients | Percentage |
| 75 g | sour culture | 30% |
| 250 g | Roggenmehl 1370 (rye flour 1370) / US Rye flour | 100% |
| 162 ml | Water | 70% |
| 2.5 g | Malt (roggenmalt) | 1% |
| 3.75 g | Instant yeast /(7.5g Fresh Yeast) | 1.5% |
| 493g | in total |
| 1 | Mix the dough with all ingredients, Cover and ferment at room temperature until the dough has visibly expanded and shows broken bubbles on the surface, 30-40 minutes. | |
| 2 | take out the dough and roll it in ball shape, like in my video below, put it in well-floured proofing baskets. |  |
| 3 | cover and proof for another 40-50 mins |  |
| 4 | Turn it out and bake with a preheat oven 250°C with the baking surface in the middle bake on a pizza stone for 15mins ( in dutch oven take out the cover after 15 mins) , then reduce the temperature to 220°C and continue baking for 15 mins . Transfer to a rack and cool thoroughly before slicing. |  |
| German type rye 1370 | US type rye |
| flour is fine grinding | flour with some crushed grain |
| color light brown | color medium brown |
| hydration 70% | hydration 70% |
| texture after bake: moist | texture after bake: good |
| taste of flavor: good | taste of flavor : rich |


Once you have the sourdough starter, you can ready to build a Levain for your bread dough.
Feed it 3 days in advance. (i like to feed it 3 days for a stronger stiff levain, specially in winter)
you can feed it for 2 days. click to download the time schedule with step by step and easy bake your sourdough bread!

Gelatin used in food usually runs from 125 Bloom to 250 Bloom.
Add gelatin into other ingredient, first hydrate and soften it (called blooming) in cold liquid.
You can use the exciting gelatin sheet to converting into other gelatin grade if need.
following is the conversion formula allow us to use in different recipe.
example you have
5 g of silver grade 160 bloom want to convert to gold 200 bloom gelatin
160>200 bloom convert factor 1.12 =1.12 x 5 = 5.6g (5.6 g silver = 5 g 200 bloom gold grade)
if to exchange the covert from 200 gold > 160 silver bloom
0.89 x 5 =4.45g (4.45g gold = 5 g silver 160 bloom grade)
| Gelatin grade | bloom strength | convert to bloom strength | covert factor |
| Gold | 200 | 160 silver | 1.12 |
| 200 | 140 bronze | 1.19 | |
| Silver | 160 | 200 gold | 0.89 |
| 160 | 140 bronze | 1.06 | |
| Bronze | 140 | 200 gold | 0.83 |
| 140 | 160 silver | 0.93 |

Hydrate gelatin in cold water. Allow to set in cooler.
Melt gelatin. Allow to set and cut to scale as needed

Before you make a sourdough bread, you need to make a sourdough starter. This is a culture of flour and water for growing wild yeast and developing those bacteria. Having a “ripe” or fully developed, starter ensures a good flavor and rise development in your sourdough bread.
You can make your own starter in about 5-7 days. You can use the yeast water to make your starter.
Once you have a starter, you never have to make one again. feed once a week, and take it out 1-2 days before you make a bread dough
You also can buy a sourdough starter by goldrush or our sourdough starter to speed up the process and different kind of starter become different flavor in your dough.
Process time: 5-7 days
Day 1
100 g Organic rye flour
150 ml Luke warm water
mix it and keep in counter top for 24 hours
Day 2
75 g mixture from day 1
50 g Organic rye flour
50 g white flour
125 ml Luke warm water
mix it and keep in room temp. for another 24 hours.
Day 3
75 g mixture from day 2
100g white flour
125 ml water
Cover with plastic and rest in room temp. for 24 hours, wait to see the bubble in the starter. And keep doing the same method as Day 3 for Day 4 and 5 ..
Your starter is ready and you can keep in the fridge and keep feeding 2-3 times per week.

Or you can use the Yeast water to develop a starter
Process time: 3-4 days
Day 1
100 ml Yeast water
100g Flour
mix it well and wait 24 hours
Day 2
above
50g flour
25ml water
wait 24 hours
Day 3
Check your sourdough on day 2 and day 3 , are they develop any bubble on top. if not keep it in room temperature for another 12 or 24 hours.

Keep this sourdough in fridge and feed it once a week if you not baking regularly.
Feeding 1:1 (water:flour)
25ml water
25 g flour
Make sure your sourdough culture is active. If your sourdough has been in the refrigerator, take it out 2 to 3 days before you plan to bake. Feed it daily to make sure it’s strong and very active before you make the bread.